How to manage Kubernetes clusters in WSL with OpenLens on Windows
How to make them play well with each other
Recently I’ve been playing with a few different tools to make me more proficient when working with Kubernetes. Additionally, people that know me know I play lots of games – sinking more and more time into Destiny 2 – so I keep Windows as my daily desktop driver and even with all the grievances of WSL – including random loss of networking – I still use it as a daily driver to write code and do other work in a Linux environment while still retaining a Windows “desktop”.

During all this time, I’ve amassed a few nifty commands to make my life easier when running kubectl commands. During my time at Ubisoft – talk about video games, huh! – I also learned of this nice tool called k9s (akin to “canine”, a dog) which is a terminal-only application to automate mundane tasks in Kubernetes, like switching namespaces, tailing logs, port forwarding and the likes, without having to type the entirety of the command in your terminal. Super good and I can’t recommend it enough! Go here if k9s would fit your needs to grab a download and understand how it works.
Thing is, on a point-and-click desktop environment (and knowing that people very proficient at Vim would probably contradict me here) I feel clicks would take me further faster than typing commands or doing key combinations, so I wondered if there are some UI alternatives that I can leverage.
Mirantis Lens & OpenLens

Back then too I learned of Mirantis Lens: a desktop application that helps you manage your clusters. It’s a nice tool and back then it was free, but I learned recently that they started charging for some features, especially when used in a “corporate” environment and, while it may be still free for personal use, the requirements to fall under a “personal use” usage are not that generous anymore.
Enter the room the Open Source community: a group of people decided to take Mirantis Lens and, since its code is Open Source, they decided to start offering truly Open Source builds out of it with all the “paid” features extracted from it and only using the publicly accessible Open Source code, and they called it “OpenLens”. Their “Releases” section includes downloads for pretty much all platforms you can think of, including Windows, Linux and macOS.
OpenLens, without the “paid” features
Some problems started around version 6.3.0 of Mirantis Lens when they decided to remove some “plugins” from the application’s bundle to reduce the amount of time it would take for the UI to load and make it safer. That, plus parts of the plugins have “proprietary” code owned by Mirantis that’s not Open Source, so it doesn’t make sense to bundle it with the Open Source code.
The plugin in question was the one in charge of providing “pod log tailing” and “exec” capabilities, which are pretty much the bread and butter of a Kubernetes cluster management tool. Naturally, this pissed a bunch of people off…
Now understand that reduce the amount of time to load the UI part in whatever way you like, I’ll leave the exercise for the reader here, although following the GitHub discussion you’ll see them being called “greedy” among other pejoratives. Still, that movement seems fair to me, considering the software is free and they needed a way to make money out of it, but the part that doesn’t sit well with me is that this extension was already somewhat bundled, but then was taken aback by a more “closed source” approach: they could’ve lent an “olive branch” to the Open Source Community.
Restoring log tailing and exec capabilities in OpenLens
Naturally, the Open Source community did its thing and decided to offer the same features that were removed from the Open Source version of Lens. Lens extensions are just NPM packages, and a new player decided to provide the plugin that restores “pod log tailing” and “exec” capabilities back to the Open Source version.
To install it, you simply have to go into File > Extensions then in Name or file path or URL, paste the following:
@alebcay/openlens-node-pod-menuThen, my recommendation is to close and reopen OpenLens to make sure the extension is loaded properly… When I installed it for the first time, I had the “Status” of the plugin swap aggressively from Enabled to Disabled and vice-versa. When you’re back in, make sure to select a Pod: you should see the following new icons that weren’t there before:

Now granted, if Mirantis changes the code enough so the plugin is no longer functional, chances are this will break. For the time being though, it works more than well. So naturally, let’s take it for a spin and see how it works in WSL.
Making OpenLens work with WSL
I don’t know about you, but I have all my $KUBECONFIG files in WSL, not in the Windows filesystem. Moreover, I’m frequently changing between Cloud Providers, and often these bundle an authentication plugin to authenticate against their APIs: Amazon would use the aws CLI, while Google Cloud would use the gcloud CLI instead.
So if we use the mounted network volume that Windows configures automatically as part of WSL, under \\wsl$\, and we use that to locate our $KUBECONFIG, chances are, OpenLens won’t understand it has to use those auth plugins inside WSL and not in Windows to authenticate against the APIs.
Fortunately, kubectl and the fact we can run apps in WSL that can “listen on a port” that it’s then available to your Windows filesystem can come to help in this scenario. Let’s leverage that!
Spinning up a local proxy to access the Kubernetes API
First, we need to spin up a local proxy to access the Kubernetes API. To do that, we can use the kubectl proxy command, which will spin up a local proxy that will listen on port 8001.
8001 isn’t available for any reason, you can change the port option with the flag in the command. If you decide to do so, please make sure to update the remaining steps to match the port of your choice.You might be tempted to quickly go and run kubectl proxy, hit enter, and move along… While that will work for most of the features of OpenLens, it won’t work for the exec feature, since performing exec requests through kubectl proxy is disabled by default for security reasons.
Please ensure that you and only you can access port 8001 on your machine while the port forwarding is in use. If you’re on a shared network, ensure the network is trusted (don’t do this on a Starbucks WiFi, for example!) or that you have a Windows Firewall that would prevent connections not coming from your machine from connecting to it.
With port forward enabled and exec capabilities on, you’re providing God mode capabilities to your cluster to anyone who can find this URL.
So what we have to do instead is not only create the proxy but also allow access to the exec feature. To do that, we can use the following command:
kubectl proxy --port 8001 --reject-paths "^/api/./pods/./attach"This will start a proxy session on port 8001 with support for connecting to the running container via exec – which is normally in the --reject-paths parameter by default but we override to not include it.
Now let’s access the cluster from OpenLens.
Connecting to the proxy from OpenLens
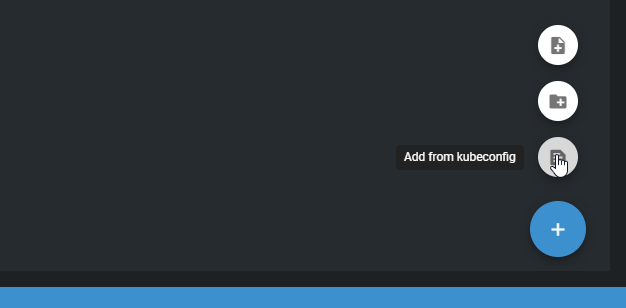
Add a new cluster in OpenLens by going to File > Add Cluster (or if it’s your first time opening the app, configure the cluster in the “Welcome” screen). You’ll need to “select a $KUBECONFIG” or you can actually paste one as well:

We’ll take that to our advantage by creating a very simple, no-authentication $KUBECONFIG file. Use the following file:
apiVersion: v1
kind: Config
clusters:
  - name: "WSL Cluster"
    cluster:
      server: http://localhost:8001
users:
  - name: nouser
contexts:
  - name: "WSL Cluster"
    context:
      cluster: "WSL Cluster"
      user: nouser
current-context: "WSL Cluster"
preferences: {}
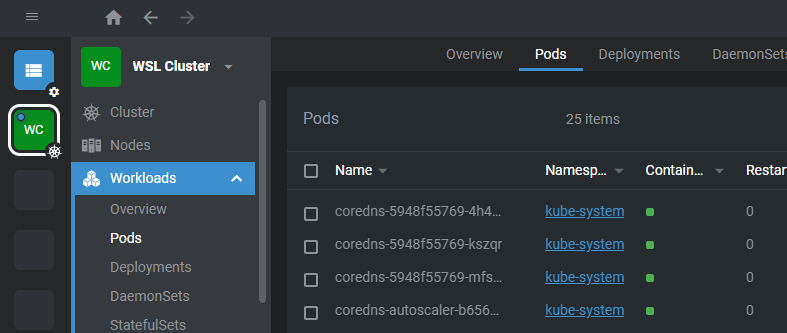
From the above, the only thing you need to ensure matches what you configured is the server URL. If you changed the port, make sure to update it here as well. Paste that in the text box and hit “Add Cluster”. In a few seconds, you should see what you need in the OpenLens UI, or even add that cluster to your left navigation bar.
Here’s how it looks on my side:

The advantages of course are quite obvious:
- If you’re using a public cloud provider like AWS or Google Cloud, you don’t need to authenticate their CLI both in WSL and on Windows… You don’t even need to install their CLI or SDKs on Windows!
- You can keep using your own
$KUBECONFIGfiles, and you don’t even have to copy them to the Windows filesystem - If you want to connect to a different cluster, you can stop the
proxyin the old cluster and start it with the new cluster - You get to keep your trusty and friendly CLI tools to continue managing your clusters
One main caveat is if you want to manage multiple clusters at once. You might be using something like kubectx to have one massive $KUBECONFIG file with all your clusters inside – I prefer separate $KUBECONFIG files per cluster – and as such, first ensure your context is set to the right cluster before issuing the proxy command, then simply add one proxy per cluster, as well as adding each separate cluster in OpenLens, by adding as many of the $KUBECONFIG files like the one we wrote above as needed.
There you have it! A quick and quite dirty way of allowing your OpenLens on Windows to connect to your clusters stored in $KUBECONFIG files in WSL without having to do everything twice. Do make sure to read the warning of course, although I trust that if you’re doing Kubernetes-level stuff, you might also know whether your computer is exposing a port to your network and, potentially, the whole Internet or not.
Please ensure that you and only you can access port 8001 on your machine while the port forwarding is in use. If you’re on a shared network, ensure the network is trusted (don’t do this on a Starbucks WiFi, for example!) or that you have a Windows Firewall that would prevent connections not coming from your machine from connecting to it.
With port forward enabled and exec capabilities on, you’re providing God mode capabilities to your cluster to anyone who can find this URL.
And for the wrap-up links:
Let me know if you have any questions!

